Hiding Wire Shelving

8:55 PM
Over the weekend we made our pantry a little more usable.  There are 5 wire shelves and since we've using them we've realized they do not support a lot of the things you put on them.  Boxes tilt/fall over; and if you put more than 4 cans on one shelf it starts to sag.  And we all know that sagging is not ok.  EVER.

When we first moved in, I used tv trays to sit items on, but they take up more space than required.  I needed another solution.  Thanks to Jen at iHeart Organizing, I was saved!  She updated her pantry and added these beautiful panels made from foam board and pretty shelf liner adhesive paper!  Just lovely.


If you find yourself in the same boat, here's what you will need in order to make this transformation happen! :)  A tape measure, to measure the length and width of your shelves, a razor blade/box cutter to cut the foam board, a pencil in case you need to mark your measurements, foam board of coarse, and last but not least... adhesive shelf liner.  I found this print at Marshalls for about six dollars! 


Let's begin!  Take into consideration what sides you can actually see.  The top shelf is only visible on the bottom and the other shelves you can just see the top.  It's your choice of whether or not you want to cover both the top and bottom.  Just be prepared to buy another 2 rolls of liner.  (I only covered one side of each panel.)  


After measuring and cutting, I laid the pieces together and taped them so they would not move while adhering the liner.  I also realized that there is a trick that will help you apply the liner in literally seconds.  Here's a picture to help me explain the process.  


Cut the liner to the appropriate length.  Make sure there is excess liner on all four sides of the panel so that there is enough to cover the edges in the end.  Here's where it gets tricky and will try and explain it to the best of my ability.  Ok.  The liner is going to be rolled up.  That's ok.  Peel back approximately an inch and adhere it to your workspace.  Begin pulling the back of the liner down as you smooth out the liner with a credit card and it will adhere to the foam board.  Letting the liner stick to the counter first, will keep the board and liner in place as you pull the back of the liner away.  Hope that makes sense.  


Opening the pantry door puts a smile on my face now!  I hope this helps someone that has also been suffering from wire-shelf-itis.  First world problems, right?

Sincerely, 

The Lishias

Nursery Progress

8:03 PM
I've spent most of the summer working on Juliet's nursery.  Previously, we had a very neutral plan for the nursery, which I wrote about here.  After changing our minds on the color of the glider from "dark gray" to "light gray", we changed our minds on the entire color palette of the room.  A few months ago I found this picture on Pinterest and I loved the mix of color... poppy red, blush, and mint green!  The nursery was already mint green so I was half way there.   I felt like the colors matched her name, which made me feel closer to her and like I'm getting to know her already!


I definitely took a risk since it's a very unusual color combination, but I'm still confident that it will be beautiful.  Here is a sneak peak of how it's all coming together.  We bought her dresser on Craig's List and painted it poppy red by Pantone and we are using it for a changing table.  If you follow me on Instagram, you have seen that I lined the 9 drawers of the dresser in 3 fun prints using craft paper from Michaels.  


 Her crib is a Jenny Lind crib and we purchased it from Amazon.  We painted the crib a champagne color and the glider is the Graham glider from West Elm in Dove Gray.  Now begins the fun of picking out and buying all the textiles for the room.


Other additions to the room are actually handmade and cost a whopping $8... Tissue paper poms and a mobile. 
The tissue paper pom poms were very easy to make, but a real pain in the rear to hang!  I used these 3M hooks and hung them with string.  You can click on the link below the picture to watch a video on how to make them.  


*How to make Tissue Paper Pom Poms*

(The picture makes the coral look orange and the gold, green. I think it was the lighting.)


To Do:
Paint room (Opaline by Sherwin Williams)
Purchase all furniture
Buy a rug
Hang shelving (for books)
Stock changing table
Make and hang tissue paper pom poms
Buy and hang artwork
Make mobile
Organize closet
Mount camera for monitor

Still need:  
Humidifier
Trash can
Bed skirt
More pops of poppy red color


Sincerely,

The Lishias


Second Trimester

4:52 PM

29 weeks down, 11 more to go... (hopefully no more)!  

Summer is almost gone and so is this pregnancy.  I'm now in my third trimester and it seems to be going smoothly.  I've heard that sometimes the third can resemble the first in some ways, but so far so good.  

SECOND TRIMESTER RECAP

Sleep:  Sleep is definitely been a close companion during this pregnancy.  However, I wake up several times in the night with extreme heartburn.  UGH!
Belly Button:  Still in and getting smaller every day... However, it looks like a mini kiddie pool through clothing.  LOL!
Maternity Clothing:  I haven't bought many things.  I have found that maternity clothes do not fit very well.  I've bought several items from GAP and Old Navy that are either maternity or are lose enough to wear.  My favorite things to wear are these yoga pants from GAP.  
Weird Moments:  Nose bleeds.  One happened in a restaurant and I thought we were going to have to leave it was so bad.  
Best Moments:  Joey finally getting to feel her kick and watching his face light up!
Cravings:  Five Guys Burgers
Weight Gain:  13 pounds
Looking Forward to:  School starting!  Buying new school supplies, new clothes, and meeting all my new students!


Sincerely, 

The Lishias

Pig Pickin' Cake

12:09 AM

Every time I make this I always get asked...


mandarin orange cake
      1 box yellow cake mix
     11 oz. can of mandarin oranges with juice
     4 eggs
     1/2 cup vegetable oil

fluffy pineapple topping
     1- 9 oz. tub of Cool Whip, thawed
     1- 8 oz. can of crushed pineapple, with juice
     1- 3.4 oz. box of instant vanilla pudding

Cake:
In mixing bowl, combine cake mix, mandarin oranges (with juice), eggs, and oil.
Beat for 2 minutes with electric mixer.
Pour batter into greased cake pans (or cupcake pans with cupcake papers).
Bake for about 25 to 30 minutes at 350.
(If doing cupcakes, bake for 18-20 minutes at 350)
Allow for cake to cool!

Topping:
Combine cool whip, pineapple (with juice) and vanilla pudding mix using a hand mixer on low.
Let topping chill in refrigerator for 15 minutes before applying to cake.
Enjoy!

Sincerely,

The Lishias

IKEA Step Stool Update

12:06 PM
I'm out for summer and getting to do all the little things I've wanted to do all year.  Sleep in, organize my house, plan projects, and anything else that I think of... painting the legs of this IKEA step stool in gold metallic paint.  

I taped each leg 2 inches from the bottom; sanded each leg enough to hold the paint; and applied 4 coats.


 Almost done! 


Sincerely, 

The Lishias

First Nursery Post

5:03 PM
We are 3 days from week 23!  This little girl is growing and couldn't be healthier.  (An answer to many prayers.)  We had a rocky start and for the past 2 months the doctors have done test after test, (a total of 6 to be exact... ahhh), thinking that she may have health problems but thankfully the journey of tests ended this past Monday with nothing but great news and good reports.  

We can now turn our attention away from worries to the many "fun parts" of having a baby.  One of those fun parts being designing and decorating the nursery!  As a celebration to our good news Monday, we finally put together her crib.  The testing was absolutely no fun at all, but it brings a priceless peace of mind to know that we will be bringing home a healthy baby girl in just 4 short months.  With that being said, we have got to get crackin'!  Here's our progress with the baby's room.  Our inspiration has been this nursery from the Sadie Olive design blog.   (I'm secretly SO excited that I get to use more pink!) 

Source List:

Bedskirt:  RH Baby and Child
Oval Frame:  You can find these at any antique shop or maybe Hobby Lobby.
Pillow:  Etsy- Colette Bream shop
Fan:  Target
Crib:  Jenny Lind 
Books:  the books will be one of the many small touches of olive green in the room.
Hamper:  Home Decorators

Sincerely, 

The Lishias

More Pink in the House

8:29 PM
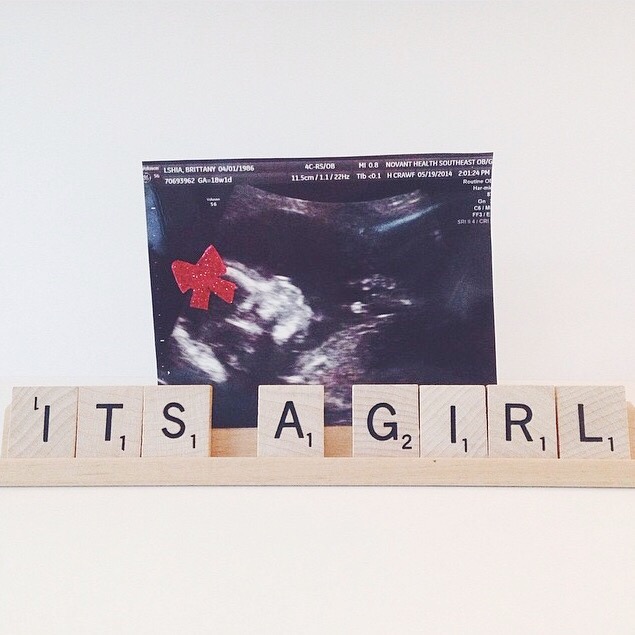
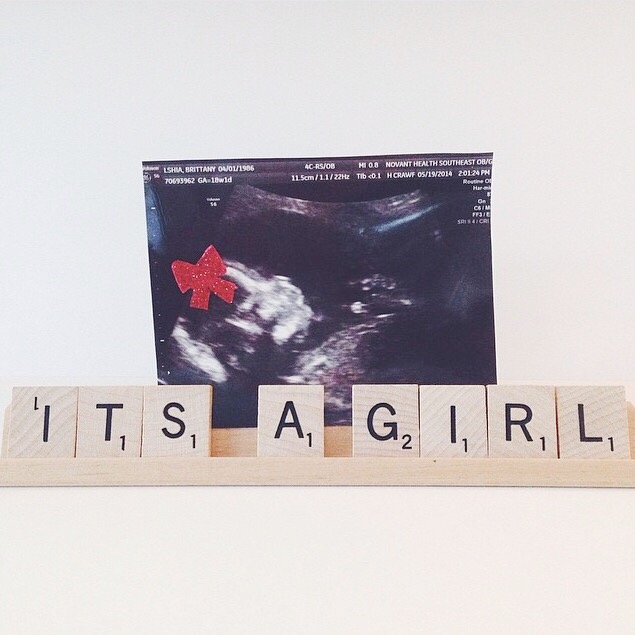
Back in May we found out today that we are having a...... little girl!!!  And we couldn't be more excited!  I can't wait to buy everything pink.  Joey was convinced that we were having a little boy and reminded me frequently in the waiting room that "when we find out it's a boy... yada, yada, yada!"  :)  When the nurse announced that we were having a girl, he smiled from ear to ear and kept saying, "I knew it, I knew it..."  HA!  Yeah, he knew it...  He's so excited about having a little daddy's girl!  


Sincerely, 

The Lishias